LDAP (Lightweight Directory Access Protocol) is an application protocol developed to access and maintain distributed information services over an IP network. LDAP Authentication allows an admin to assign different levels of access to users to keep the information secure.
LogPoint uses the LDAP service to authenticate its users. In Director Console, you can configure an LDAP Strategy for LogPoint.
Go to Configure >> Settings >> Operations >> Create LDAP Strategy.
Select the LogPoint instances where you want to create the LDAP Strategy.
Click Next.
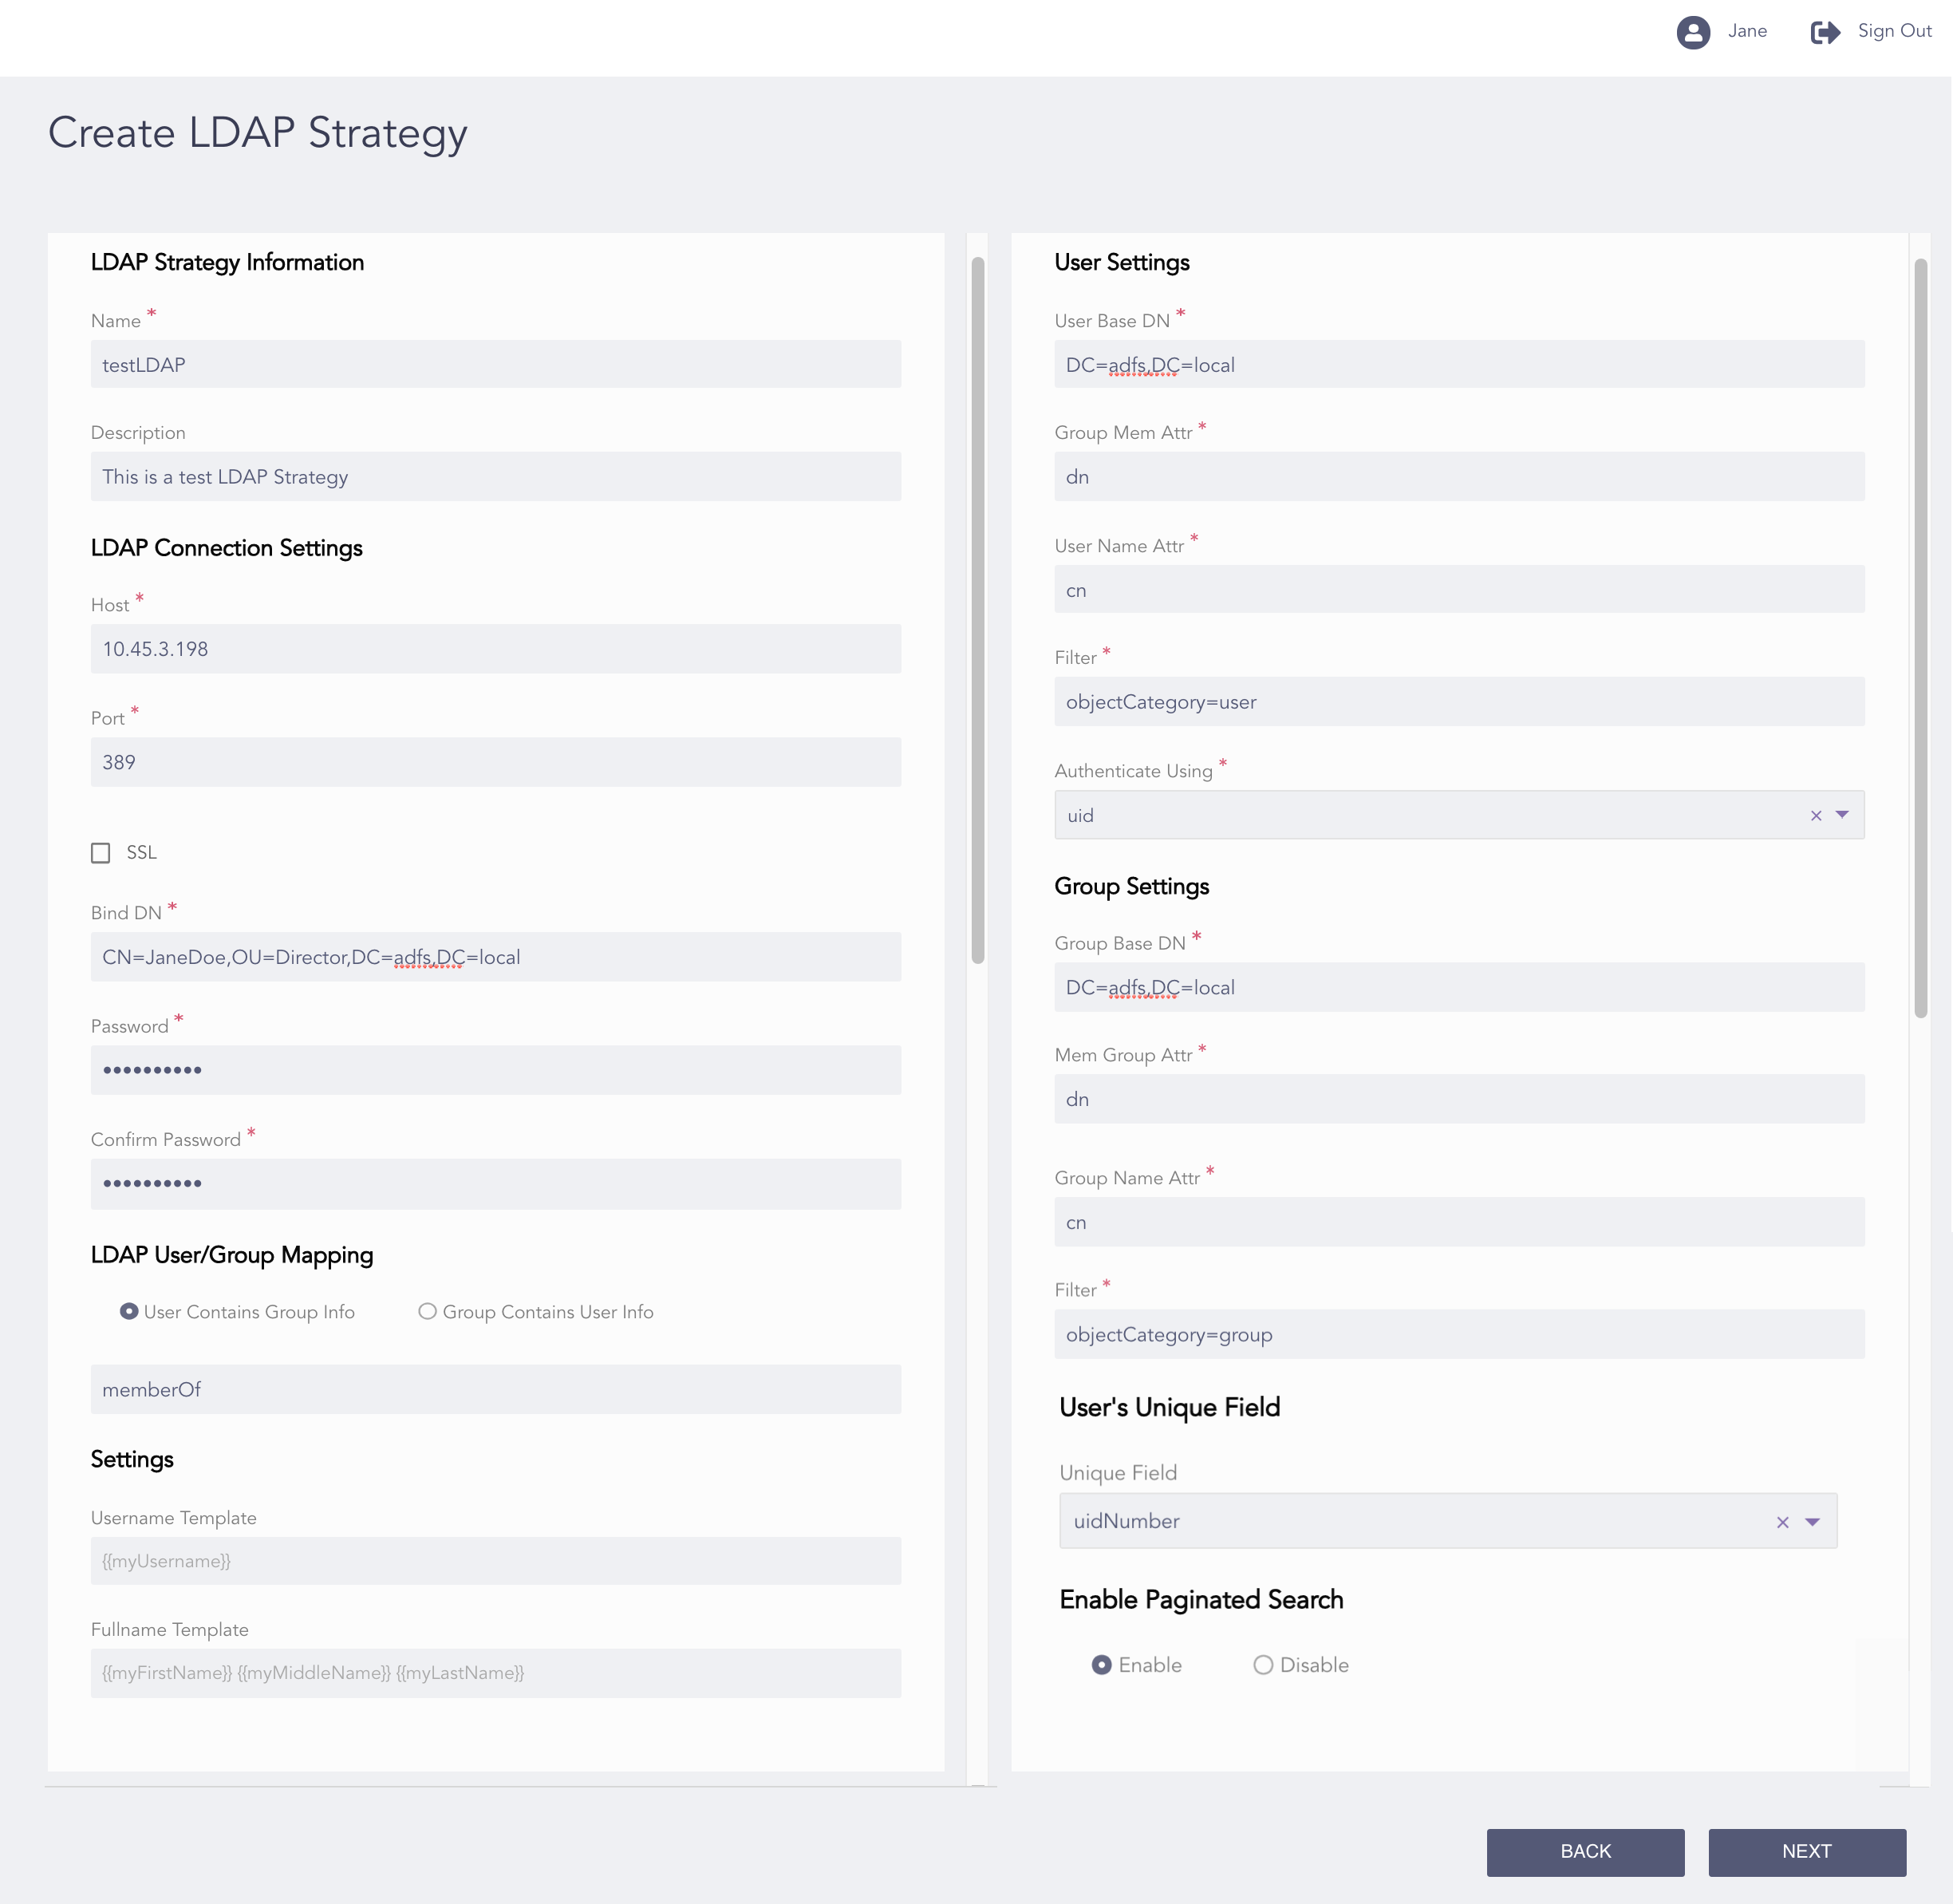
Create LDAP Strategy Page
Enter a Name and its Description.
Enter a Host and a Port of the LDAP server.
Enable SSL (Secure Sockets Layer) to establish an encrypted link.
Enter a Bind DN which is an unique name for the LDAP server.
Enter and confirm the Password to authenticate the user.
In the LDAP User/Group Mapping section, select User Contains Group Info to search for the group information of a user or Group Contains User Info to search for the user information of a group.
Enter a User Base DN which is the path where the LDAP users are present in the directory.
Group Mem Attr and User Name Attr are attributes of the group member and the user as provided in the database.
The Filter attribute allows you to refine the user results.
Select Authenticate Using from the drop-down to authenticate the login.
Select dn to use the standard DN format for login.
Select uid to use it for login.
Select Sam Account Name to use it for login.
Enter a Group Base DN which is the path under which the LDAP users are present in the directory.
Mem Group Attr and Group Name Attr are attributes of the member present in a group and the group name as provided in the database respectively. Both the fields are auto-generated.
The Filter attribute allows you to refine the group results.
In the User’s Unique Field section, select a Unique Field to uniquely identify each user.
In the Enable Paginated Search section, select Enable to paginate the search if the remote server offers paginated search service or select Disable to deactivate the paginated search.
In the Settings section, enter a Username Template and a Fullname Template in the jinja format.
Click Next.

Confirming the Changes
Review your changes. You can go Back to make any changes if necessary.
Note
Click Download Report to save the summary of the task in PDF.
Click Finish.
Click OK.